-
How to backup and restore disks on Linux and Mac computers using R-Drive Image
Note: If you use the startup (bootable) version of R-Drive Image on a computer other than that on which your copy of R-Drive Image is registered, the R-Drive Image startup disk will work in its Demo mode (with full functionality) for 7 days starting from the date when it was created.
Moreover, the startup version of R-Drive Image has almost the same features as its Windows counterpart. The only exception is the lack of the built-in scheduler, tasks, scripts, and connecting images as virtual disks, although copying individual files from opened images is a good substitution for the latter. The other features useful for non-Windows computers like support for various Apple and Linux volume managers are fully intact.
As a benchmark, we'll use a real PC running under Linux Ubuntu Mate 20.04.1 LTS 64-bit with the file system of the system disk being ext4 fs. The procedure for Mac computers will not be much different from this, except for starting the computer.
In this article we'll show how the startup version of R-Drive Image can be used to service a non-Windows computer. We'll simulate the following scenario:
- Disk backup of a non-Windows workstation.
- Disk crash that completely corrupted data on that disk in such a way that the computer cannot start.
- Data restore on that disk from the image and attempt to start up the computer with the restored system.
Please also note that we'll take pictures directly from a real LCD monitor and make allowance for the image quality.
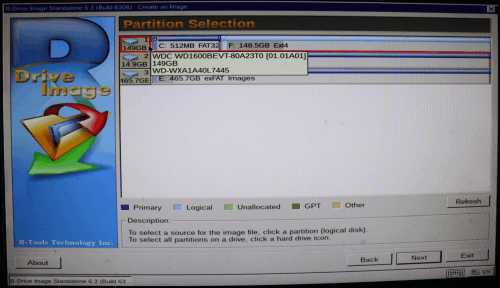
The partition scheme for the Linux disk is shown on the picture below.
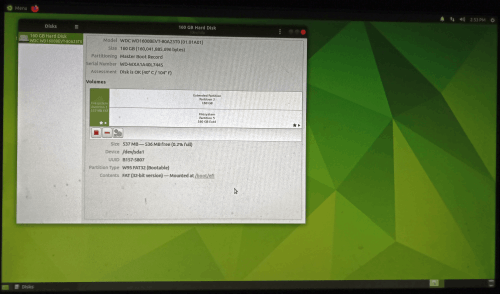
Click image to enlarge
Some preliminary actions
1. Create a bootable USB stick with the startup version of R-Drive Image. You may do it directly from the main panel of R-Drive Image. See the R-Drive Image on-line help page "Create Startup Disks" for more detail.
2. Connect another disk large enough to store the disk image to the computer.
Image Creation
When we're ready, we can start creating the image of the Linux disk.
1. Start the computer with the bootable stick.
- Make sure that the first startup device in the system BIOS is the right drive. Disable "Secure boot" in the system BIOS if your computer is certified to run Windows 8/10. Refer to your system documentation for details.
- Connect the USB disk and start your computer.
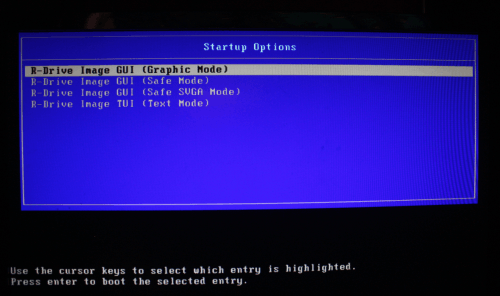
Click image to enlarge
Select the R-Drive Image GUI (Graphic Mode) to run R-Drive Image in the graphic mode in which its user interface is similar to the Windows version.
You may read more information on R-Drive Image help page "Load Computer into Startup Mode". This may be especially helpful if you need to start a Mac computer. - Accept the License Agreement and let R-Drive Image to finish its startup procedure.
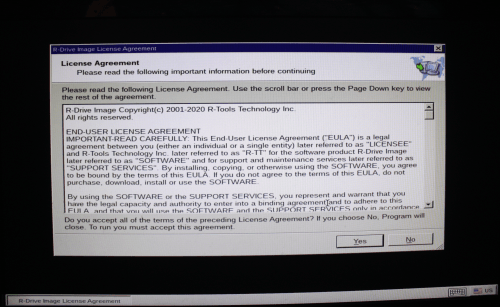
Click image to enlarge
2. Select Create an Image on the Action Selection panel and click the Next button.
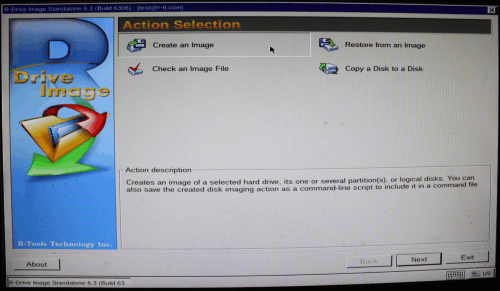
Click image to enlarge
3. Locate the disk you want to backup, select the entire disk icon, and click the Next button.
Click image to enlarge
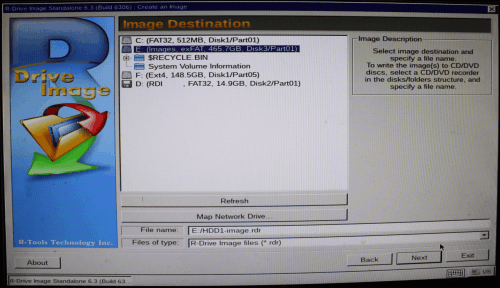
4. Select the place to store the image, specify its file name, and click the Next button.
Click image to enlarge
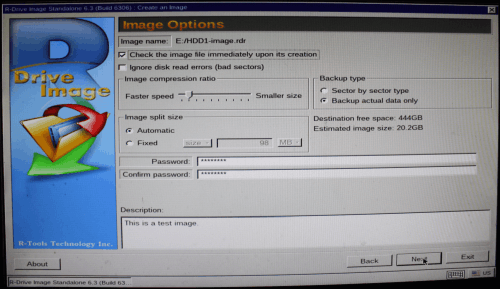
5. Select image options on the Image Options panel and click the Next button.
Click image to enlarge
R-Drive Image can back up only useful information on disk. In other words, only sectors with actual data will be written to the image file. That may greatly reduce image size. It also can check the integrity of disk image right after its creation and report errors immediately.
The image file may also be protected with a password, but this feature provides only a relatively moderate protection against conventional unauthorized access.
You may read more about other image options on R-Drive Image help page "Create an Image".
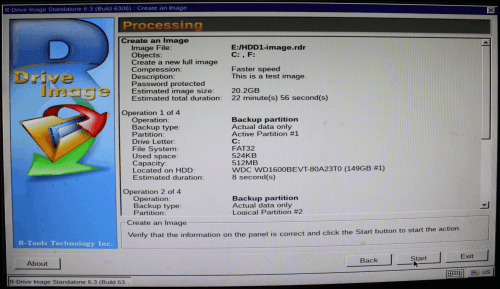
6. Verify the image parameters and click the Start button.
Click image to enlarge
R-Drive Image will start imaging disk showing its progress.
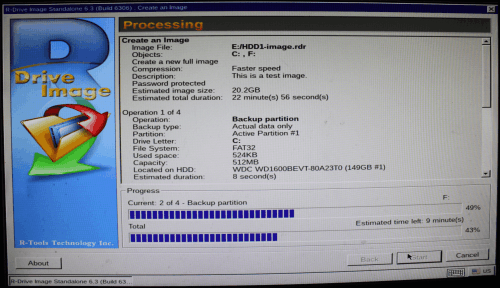
Click image to enlarge
When the imaging is over, you may switch your computer off.
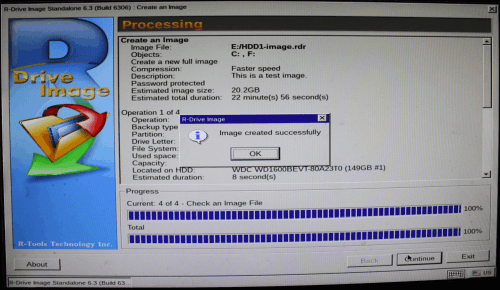
Click image to enlarge
Disk crash simulation
We simulated the disk crash by deleting all disk partitions using a Windows disk manager. Obviously, the Linux computer cannot start after this operation. We need to restore data back to the Linux disk to revive the computer.
Restoring data to the Linux disk
1. Start the computer with the bootable stick as it's described in the Image Creation part of this article.
2. Select Restore from an Image on the Action Selection panel and click the Next button.
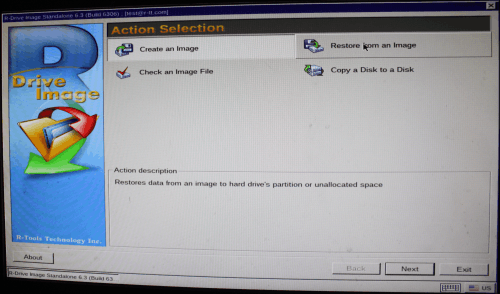
Click image to enlarge
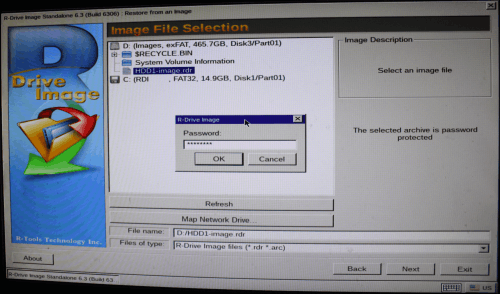
3. Select the image file on the Image File Selection panel and click the Next button.
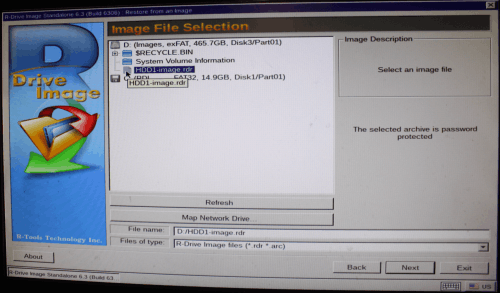
Click image to enlarge
4. Enter the password if necessary.
Click image to enlarge
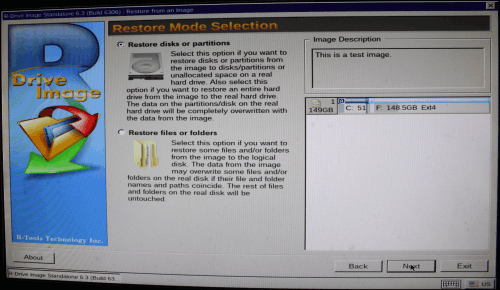
5. Select Restore disks or partitions on the Restore Mode Selection panel and click the Next button.
Click image to enlarge
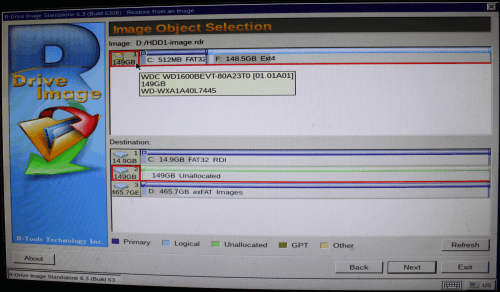
6. Select the entire disk icon in the Image part and the entire disk icon in the Destination part on the Image Object Selection panel and click the Next button.
Click image to enlarge
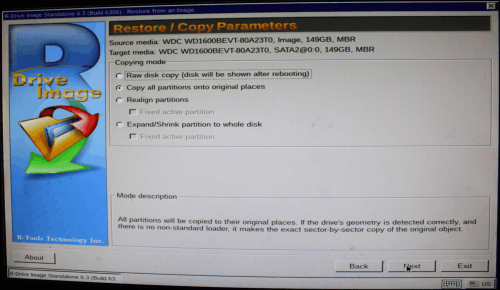
7. Select Copy all partitions onto original places on the Restore/Copy Parameters panel and click the Next button.
Click image to enlarge
8. Verify that all restore parameters are correct on the Processing panel and click the Next button.
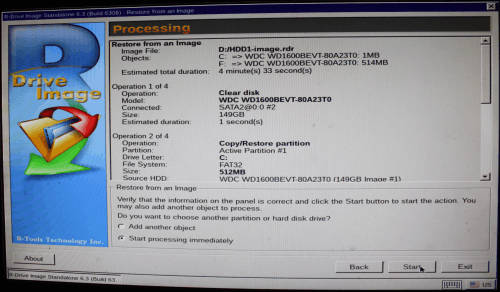
Click image to enlarge
R-Drive Image will start restoring data to the disk showing its progress.
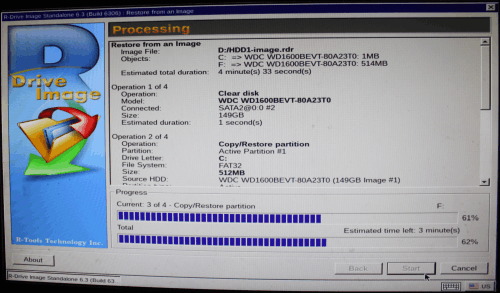
Click image to enlarge
When data is completely restored switch the computer off.
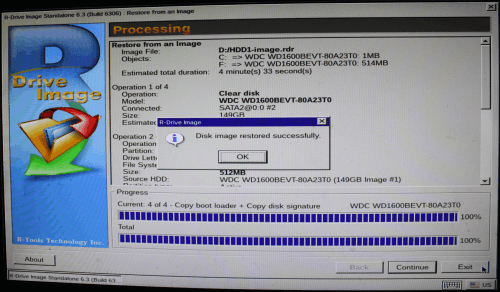
Click image to enlarge
Disconnect the disk with images and bootable USB stick and start the computer again. It should load into the restored Linux OS.
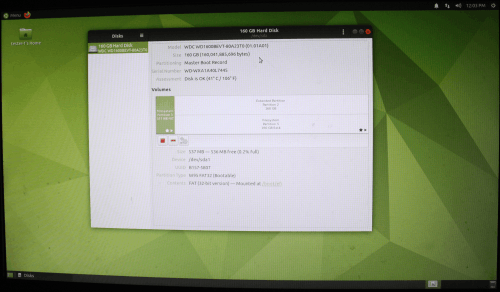
Click image to enlarge
Conclusions
As our test has shown, the startup version of R-Drive Image can work not only with the Windows OS, but with Linux and Mac computers, too. In this article we have discussed some basic disk operations like creating disk images and restoring data back to the original disk. It also can perform more advanced actions like retrieving individual files from disk images of non-Windows computers.
- R-Studio Technician: activation using a USB stick
- Data Recovery Guide
- Why R-Studio?
- R-Studio for Forensic and Data Recovery Business
- R-STUDIO Review on TopTenReviews
- File Recovery Specifics for SSD devices
- How to recover data from NVMe devices
- Predicting Success of Common Data Recovery Cases
- Recovery of Overwritten Data
- Emergency File Recovery Using R-Studio Emergency
- RAID Recovery Presentation
- R-Studio: Data recovery from a non-functional computer
- File Recovery from a Computer that Won't Boot
- Clone Disks Before File Recovery
- HD Video Recovery from SD cards
- File Recovery from an Unbootable Mac Computer
- The best way to recover files from a Mac system disk
- Data Recovery from an Encrypted Linux Disk after a System Crash
- Data Recovery from Apple Disk Images (.DMG files)
- File Recovery after Re-installing Windows
- R-Studio: Data Recovery over Network
- How To Use R-Studio Corporate Package
- Data Recovery from a Re-Formatted NTFS Disk
- Data Recovery from an ReFS disk
- Data Recovery from a Re-Formatted exFAT/FAT Disk
- Data Recovery from an Erased HFS Disk
- Data Recovery from an Erased APFS Disk
- Data Recovery from a Re-Formatted Ext2/3/4FS Disk
- Data Recovery from an XFS Disk
- Data Recovery from a Simple NAS
- How to connect virtual RAID and LVM/LDM volumes to the operating system
- Specifics of File Recovery After a Quick Format
- Data Recovery After Partition Manager Crash
- File Recovery vs. File Repair
- Data Recovery from Virtual Machines
- How to Recover Files from a Remote Computer Using R-Studio Standalone License and Its Network Capabilities in Demo Mode
- How to Connect Disks to a Computer
- Emergency Data Recovery over Network
- Data Recovery over the Internet
- Creating a Custom Known File Type for R-Studio
- Finding RAID parameters
- Recovering Partitions on a Damaged Disk
- NAT and Firewall Traversal for Remote Data Recovery
- Data Recovery from an External Disk with a Damaged File System
- File Recovery Basics
- Default Parameters of Software Stripe Sets (RAID 0) in Mac OS X
- Data Recovery from Virtual Hard Disk (VHD/VHDX) Files
- Data Recovery from Various File Container Formats and Encrypted Disks
- Automatic RAID Parameter Detection
- IntelligentScan Data Recovery Technology
- Multi-pass imaging in R-Studio
- Runtime Imaging in R-Studio
- Linear Imaging vs Runtime Imaging vs Multi-Pass Imaging
- USB Stabilizer Tech for unstable USB devices
- Joint work of R-Studio and PC-3000 UDMA hardware
- Joint work of R-Studio and HDDSuperClone
- R-Studio T80+ - A Professional Data Recovery and Forensic Solution for Small Business and Individuals Just for 1 USD/day
- Backup Articles
- R-Drive Image Standalone and Corporate license transferring
- Fixing Windows update error 0x80070643 with R-Drive Image
- Backup with Confidence
- R-Drive Image as a free powerful partition manager
- Computer Recovery and System Restore
- Disk Cloning and Mass System Deployment
- Accessing Individual Files or Folders on a Backed Up Disk Image
- R-Drive Image startup / bootable version
- File Backup for Personal Computers and Laptops of Home and Self-Employed Users
- Creating a Data Consistent, Space Efficient Data Backup Plan for a Small Business Server
- How to Move the Already Installed Windows from an Old HDD to a New SSD Device and Create a Hybrid Data Storage System
- How to Move an Installed Windows to a Larger Disk
- How to Move a BitLocker-Encrypted System Disk to a New Storage Device
- How to backup and restore disks on Linux and Mac computers using R-Drive Image
- R-Drive Image and Virtual Machines
- Undelete Articles
- Get Deleted Files Back
- Free Recovery from SD and Memory cards
- R-Undelete: Video Recovery
- Recovery from an External Device with a Damaged File System
- File recovery from a non-functional computer
- Free File Recovery from an Android Phone Memory Card
- Free Photo and Video File Recovery Tutorial
- Easy file recovery in three steps
Rating: 4.6 / 5
However, what I wanted to suggest is that you create a Home version of your software that may have slightly ...
https://www.drive-image.com/DriveImage_Help/restorefromanimage.htm
For example, there is no ` Restore from an Image` on the GUI. Instead there is `Restore Image`. And there is no `Image File Selection` on the GUI. Instead there is `Select image file`. And so on... My suggestion is to open the app, go through a file restore, write down the steps exactly as done, and then ...


